Wednesday, January 1, 2014

Welcome In, 2014!

I'm pretty jaded and don't usually believe in new year resolutions. Aren't they just markers for failure and self-loathing? This sentiment is probably the results of years of disappointment. I start strong... and start fading in February; by March, any attempt at a change has gone out the window. 

However, I read an article on my favorite blog about setting goals over a monthly period, rather than yearly. That makes lots of sense to me. It's definitely easier to change a habit or start a new healthy habit when the end of the tunnel is in 30 days. So I'll be taking my goals a month at a time... and if they work out, great! And I'll try to keep them going, but just making one month is the goal. 

And as I have learned through residency, setting measurable, achievable goals are paramount in importance. Goals and resolutions should be realistic, and progression can be tracked by measurable outcomes. A resolution to "be more healthy" should include details such as "lose ___ pounds by ___ weeks/months" or "limit eating out to 1-2 times per week." 

Below are my resolutions for the year. I only have a few, because anymore will stretch me out too thin and make me too cranky! Too many changes at once and discourage anyone... so I figure trying to meet a few good ones is better than failing a whole lot of resolutions. 
  1. Be open to new experiences outside my comfort zone. Try something original at least once a quarter. 
  2. Pray for my non-Christian family and friends at least once a week. 
  3. Limit spending on frivolous items (*ahem* clothing and shoes...)
  4. Exercise... the bane of my life *sigh*
    1. 150 minutes of exercise per week according to recommended guidelines


Sunday, October 13, 2013

Steak and Potatoes

We had a very American, Midwest sort of meal tonight. Meat and potatoes. A nice rib-eye steak with lots of marbling and Russet potatoes to be exact. 

Not wanting to fire up the BBQ grill, I searched for a more indoor-friendly way to cook steak. Finally, settled on Alton Brown's Pan-Seared Rib-Eye recipe... except, we don't have a cast-iron skillet at home. So we improvised a little. Started the steak on the stovetop over high heat in a heavy frypan (happened to be non-stick), then transferred the steak to the oven to broil for a few minutes on each side. Nervously, I checked the steak for doneness. Eureka! Perfectly medium done. 

We paired the steak with baked Hasselback potatoes. Recipe and picture can be found here. Check it out! What a fancy and more eye-pleasing way to serve potatoes!

A few more details on the steak: 
-Let the steak come to room temperature a few hours before cooking. 
-A simple seasoning of olive oil and salt and pepper turns out great. We had some steak seasoning at home and used that today. 
-Our steak was about 3/4 inch thick. On the dry skillet on high heat, we seared the steak for 30 seconds on each side. Then we transferred the steak to a hot ovenproof pan in a preheated oven on broil. We broiled the steak for 3 minutes, flipped the steak, and another 3 minutes. Then remove the steak from the oven and pan, and rest the steak for about 5 minutes prior to serving. This resulted in a medium-done steak. 

Monday, October 7, 2013

Harvest Time Means Zucchini Bread Time

I seriously think whoever came up with zucchini in bread is a genius. It's the best way to eat your veggies!

More is better, right? I upped the grated zucchini from 2 cups to 4 cups, since I had an awfully large amount of zucchini to use up! To create a healthier baked good, I've heard of substituting applesauce for oil in bread recipes (carrot cake, banana bread, etc.), but I typically don't have applesauce on hand. Instead, I subbed plain yogurt for oil in this recipe and it turned out perfect! No on could taste any difference. Also, now that I'm living back home again, I gotta remember to cut down on the sugar for my hyper sweet-sensitive family! The original recipe is from Allrecipes... but I think my adaptation is healthier without sacrificing taste!


Zucchini Bread
modified from allrecipes.com

3 cups all-purpose flour
1 teaspoon salt
1 teaspoon baking soda
1 teaspoon baking powder
3 eggs
1/2 cup oil
Heaping 1/2 cup plain yogurt
1 3/4 cup sugar
3 teaspoons vanilla extract
4 cups zucchini
1 cup chopped walnuts or pecans

1/2 cup oats
1/2 cup brown sugar
1/4 cup flour
1 teaspoon cinnamon
1/3 cup melted butter

  1. Preheat oven to 325 degrees F. Grease and flour 2 loaf pans (8x4) or 24 muffin tins.
  2. Beat eggs, oil, yogurt, sugar and vanilla extract in a large bowl. Add in 3 cups of flour, salt, baking soda, and baking powder and mix well. Stir in zucchini and nuts until just combined. Pour batter into prepared pans. 
  3. Topping: In a small bowl, mix together oats, brown sugar, 1/4 cup flour, cinnamon, and melted butter. Mixture should be crumbly with the size of peas. Sprinkle topping over batter. 
  4. Bake for 40-60 minutes (shorter time for muffins), and until toothpick inserted in center comes out clean. 

Friday, September 20, 2013

His and Her Pizzas

All you need is 4 simple ingredients for Pioneer Woman's pizza dough recipe. There is NO excuse not to make your own pizza! I love pizza, because it is versatile. For the base, you can go traditional with tomato sauce or go classy with pesto or even more simple, just garlic olive oil drizzled on the dough. Varieties of cheeses abound- mozzarella, cheddar, goat cheese, parmesan. Then there are the toppings... veggies, meats, fruits. Whatever you want, I promise it'll probably taste delicious on this pizza crust! Let your imagination create and design your pizza masterpiece!

My his and her pizzas are for my parents. Mom enjoys her pizza with Canadian bacon and pineapple rings. Dad loves his garlic shrimp, fresh basil, and arugula pizza.

Pizza Dough 
from thepioneerwoman
makes 2 crusts

1 teaspoon active dry or instant yeast
4 cups all-purpose flour
1 teaspoon salt
1/3 cup olive oil

  1. Sprinkle yeast over 1 1/2 cups warm (not hot!) water. Set aside.
  2. Combine flour and salt. With mixer on low, drizzle in olive oil until combined with flour mixture. Next, pour in yeast water and mix until just combined. 
  3. Form dough into a ball. Coat a separate mixing bowl with a drizzle of olive oil, and toss dough into bowl and coat well with olive oil. Cover bowl tightly with plastic wrap and store in fridge until needed. May make dough 2-3 days in advance. 

Garlic Shrimp, Basil, and Arugula Pizza 

1 lb raw medium shrimp with shells removed and deveined
2 tablespoons minced garlic
Fresh basil, roughly chopped
Arugula
Mozzarella cheese, shredded
1 pizza dough crust
  1. Preheat oven to 500 degrees F. 
  2. Saute shrimp with garlic in olive oil until just cooked. Set aside in bowl.
  3. Drizzle olive oil onto a 16x11 baking pan. Stretch and pat pizza dough into a rectangular shape and place on prepared baking pan. Brush top of pizza dough with olive oil. 
  4. Scatter a thin layer of mozarrella cheese onto surface of pizza, then arrange shrimp, and desired amounts of basil and arugula on pizza. Lastly spread more mozzarella cheese over the top. 
  5. Bake in preheated oven for 12-15 minutes, until bottom of crust browns. 


Saturday, August 24, 2013

Summertime = Blackberry Time

What's not to love about blackberries (besides their pesky pesky thorns)? They're the epitome of summertime goodness - sweet and tart, all rolled into one. We went to blackberry picking this morning and easily picked over 10 pounds in an hour or so!


I had the enviable task of deciding what to do with all these lovely berries on my counter. Settled on preserving the blackberries into jam that will last long into the rainy season. As an added bonus, I had just enough leftover to make a batch of blackberry chip ice cream! Don't you just wish you are at my house? Come over, and I promise I'll share!


Homemade Blackberry Jam
modified from Paula Deen
makes 6 half-pint jars

5 cups whole blackberries
3 1/2 cups white sugar
1 tablespoon lemon juice
6 tablespoons dry pectin (1.75 ounce package)

Directions:

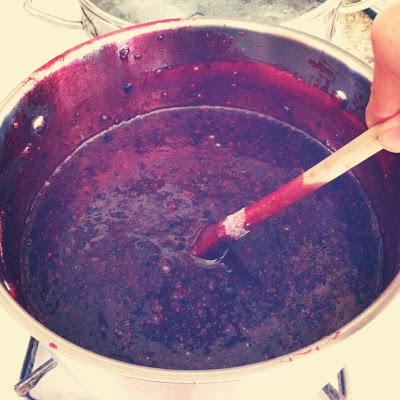
  1. Puree blackberries in blender. (You can strain the blackberry puree if you prefer seedless jam. I like mine seedy!) Combine blackberry puree, sugar, and lemon juice in large pot on high heat. Bring to boil while stirring constantly. Stir in pectin and continue boiling for 1 minute. Remove from heat and skim off foam from the surface. 
  2. Sterilize jars and lids in simmering water for 10 minutes directly before using. 
  3. While blackberry mixture is still hot, ladle or pour into the hot, sterilized jars, filling within 1/4 inch from top. Wipe rims with a clean, damp cloth, then tightly seal jars with lids and rings.
  4. Process in boiling water for 10 minutes, making sure water covers the top of the jars. Remove from water bath and allow to cool. 
Tips about canning:
-Pectin can take up to 24 to 48 hours to set. If your jam is runny, be patient and check in a few days.
-For tips about runny jam, check out this website for ways to fix. 
-Or if you're lazy, just call runny jam "old-fashioned preserves" and use over ice cream, waffles, pancakes, crepes... the possibilities are endless! 


Boiling that blackberry goodness!

Wednesday, August 21, 2013

the flag cake

The perfect cake for 4th of July, no other worded needed. 


Flag Cake
from The Barefoot Contessa

18 tablespoons unsalted butter, at room temperature
3 cups sugar
6 large eggs, at room temperature
1 cup sour cream, at room temperature
1 1/2 teaspoons vanilla extract
1 1/2 teaspoon almond extract (optional)
3 cups all-purpose flour
1/3 cup cornstarch
1 teaspoon kosher salt
1 teaspoon baking soda

Icing: Whipped Cream Cheese Frosting
from Allrecipes.com

1 (8 ounce) package cream cheese, softened
1 cup white sugar (may substitue with 1 3/4 cup powdered sugar)
1/8 teaspoon salt
1 teaspoon vanilla extract
1 1/2 cups heavy whipping cream

Directions:
  1. Heat oven to 350 degrees F. Butter and flour an 18 x 12 x 1 1/2 - inch sheet pan. 
  2. Cream butter and sugar on high speed until light and fluffy. On medium speed, add eggs, 2 at a time, then add sour cream, vanilla extract, and almond extract. Scrape down the sides and stir until smooth
  3. Stir together the flour, cornstarch, salt, and baking soda in a bowl. With mixer on low speed, add flour mixture to butter mixture until just combined. Pour into prepared pan. Smooth top with spatula. Baking for 20-30 minutes, until a toothpick comes out clean. Cool to room temperature. 
  4. Icing: For best results, chill bowl and beaters prior to beating whipping cream. In a small bowl, with electric mixer beat whipping cream until stiff peaks form; set aside. In a large bowl, combine cream cheese, sugar, salt, and vanilla. Beat until smooth, then fold in whipped cream. Chill in refrigerator until use. 
  5. Assembly: Spread three-fourths of the icing over the cooled sheet cake. Outline the flag on the top of the cake with a toothpick. Fill the upper left corner with blueberries. Put remaining icing in a pastry bag (or ziplock bag) fitted with a star tip. Alternate rows of raspberries and icing until flag is completed. Pipe stars in on the blueberries. 

Wednesday, August 7, 2013

Cookie Wednesday

Everyone can use a bit of a pick-me-up to get over the hump and sail into the weekend! I brought these big, soft, chewy chocolate chip cookies to work... It may need to become a routine thing now :). 

Some tips and tricks to the perfect chocolate chip cookie:
-Adding a teaspoon of cream of tartar provides that lovely cracked surface look on your cookie 
-Use an ice cream scoop to form similar sized cookies
-Most importantly, to get a soft, chewy cookie (rather than a hard, crumbly one), do not overbake! Bake until the edges are just browned and remove from oven. Transfer to a wire rack to cool once cookies are just solid enough to remove from baking pan.