Saturday, August 24, 2013

Summertime = Blackberry Time

What's not to love about blackberries (besides their pesky pesky thorns)? They're the epitome of summertime goodness - sweet and tart, all rolled into one. We went to blackberry picking this morning and easily picked over 10 pounds in an hour or so!


I had the enviable task of deciding what to do with all these lovely berries on my counter. Settled on preserving the blackberries into jam that will last long into the rainy season. As an added bonus, I had just enough leftover to make a batch of blackberry chip ice cream! Don't you just wish you are at my house? Come over, and I promise I'll share!


Homemade Blackberry Jam
modified from Paula Deen
makes 6 half-pint jars

5 cups whole blackberries
3 1/2 cups white sugar
1 tablespoon lemon juice
6 tablespoons dry pectin (1.75 ounce package)

Directions:

  1. Puree blackberries in blender. (You can strain the blackberry puree if you prefer seedless jam. I like mine seedy!) Combine blackberry puree, sugar, and lemon juice in large pot on high heat. Bring to boil while stirring constantly. Stir in pectin and continue boiling for 1 minute. Remove from heat and skim off foam from the surface. 
  2. Sterilize jars and lids in simmering water for 10 minutes directly before using. 
  3. While blackberry mixture is still hot, ladle or pour into the hot, sterilized jars, filling within 1/4 inch from top. Wipe rims with a clean, damp cloth, then tightly seal jars with lids and rings.
  4. Process in boiling water for 10 minutes, making sure water covers the top of the jars. Remove from water bath and allow to cool. 
Tips about canning:
-Pectin can take up to 24 to 48 hours to set. If your jam is runny, be patient and check in a few days.
-For tips about runny jam, check out this website for ways to fix. 
-Or if you're lazy, just call runny jam "old-fashioned preserves" and use over ice cream, waffles, pancakes, crepes... the possibilities are endless! 
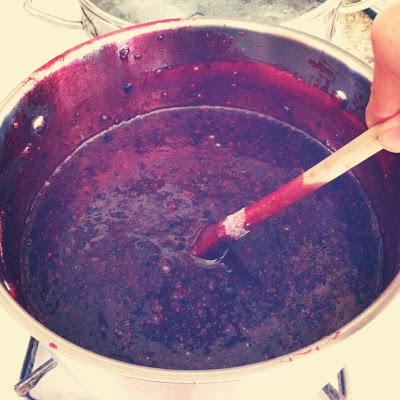

Boiling that blackberry goodness!

Wednesday, August 21, 2013

the flag cake

The perfect cake for 4th of July, no other worded needed. 


Flag Cake
from The Barefoot Contessa

18 tablespoons unsalted butter, at room temperature
3 cups sugar
6 large eggs, at room temperature
1 cup sour cream, at room temperature
1 1/2 teaspoons vanilla extract
1 1/2 teaspoon almond extract (optional)
3 cups all-purpose flour
1/3 cup cornstarch
1 teaspoon kosher salt
1 teaspoon baking soda

Icing: Whipped Cream Cheese Frosting
from Allrecipes.com

1 (8 ounce) package cream cheese, softened
1 cup white sugar (may substitue with 1 3/4 cup powdered sugar)
1/8 teaspoon salt
1 teaspoon vanilla extract
1 1/2 cups heavy whipping cream

Directions:
  1. Heat oven to 350 degrees F. Butter and flour an 18 x 12 x 1 1/2 - inch sheet pan. 
  2. Cream butter and sugar on high speed until light and fluffy. On medium speed, add eggs, 2 at a time, then add sour cream, vanilla extract, and almond extract. Scrape down the sides and stir until smooth
  3. Stir together the flour, cornstarch, salt, and baking soda in a bowl. With mixer on low speed, add flour mixture to butter mixture until just combined. Pour into prepared pan. Smooth top with spatula. Baking for 20-30 minutes, until a toothpick comes out clean. Cool to room temperature. 
  4. Icing: For best results, chill bowl and beaters prior to beating whipping cream. In a small bowl, with electric mixer beat whipping cream until stiff peaks form; set aside. In a large bowl, combine cream cheese, sugar, salt, and vanilla. Beat until smooth, then fold in whipped cream. Chill in refrigerator until use. 
  5. Assembly: Spread three-fourths of the icing over the cooled sheet cake. Outline the flag on the top of the cake with a toothpick. Fill the upper left corner with blueberries. Put remaining icing in a pastry bag (or ziplock bag) fitted with a star tip. Alternate rows of raspberries and icing until flag is completed. Pipe stars in on the blueberries. 

Wednesday, August 7, 2013

Cookie Wednesday

Everyone can use a bit of a pick-me-up to get over the hump and sail into the weekend! I brought these big, soft, chewy chocolate chip cookies to work... It may need to become a routine thing now :). 

Some tips and tricks to the perfect chocolate chip cookie:
-Adding a teaspoon of cream of tartar provides that lovely cracked surface look on your cookie 
-Use an ice cream scoop to form similar sized cookies
-Most importantly, to get a soft, chewy cookie (rather than a hard, crumbly one), do not overbake! Bake until the edges are just browned and remove from oven. Transfer to a wire rack to cool once cookies are just solid enough to remove from baking pan.